
Rotations and theMechanix
Past five lessons in this series:
- Preparing to Reverse
- Introduction to registers
- More on registers: the ABI
- Understanding Instruction Flow on AArch64 with LLDB
- Binary Logic, Shifts, and the Zero Register
Lesson Objective
This lesson has multiple objectives:
- introducing Rotations.
- introducing theMechanix, a tool I am developing mainly to do malware reversing, but that can also help us introduce a few useful concepts
The ROR instruction
ROR is a very simple instruction that “rotates” the bits within the context of a register. In its most basic form, the syntax of ROR is
ROR dest, source, #immediate
The effect is to take the last #immediate number of bits (rightmost ones), to shift right the contents of the register by immediate bits, and to fill the first immediate bits with the bits that were shifted out.
This is the key difference from shifts: the least significant bits are never lost, they simply “re-enter” on the other side as most significant bits.
An example visualised on an 8-bit register can help illustrate the concept:
Original value:         [b7 b6 b5 b4 b3 b2 b1 b0]
ROR #1                  [b0 b7 b6 b5 b4 b3 b2 b1]
Let’s see this instruction in action.
.global _main
.extern _exit

_main:
    // Setup
    mov X0, #-4        // even negative
    mov X1, #7         // odd positive
    mov X2, #-5        // odd negative

    // Rotate right by 1
    ror X3, X0, #1
    ror X4, X1, #1
    ror X5, X2, #1

    // ROL doesn't exist - emulate ROL #4
    mov X6, #0xAB      // 0x00000000000000AB
    ror X7, X6, #60    // ROL #4 = ROR #(64-4)

    mov X0, #0
    bl _exit
Save it in ROR1.s and compile it:
as ROR1.s -o ROR1.o
export SDK=$(xcrun --sdk macosx --show-sdk-path)
ld \
  -arch arm64 \
  -platform_version macos 26.0 26.0 \
  -syslibroot "$SDK" \
  -lSystem \
  -o ROR1 \
  ROR1.o
Now I ask for a little faith from you. The following instruction extracts the bytecode from the program. The bytecode is what the CPU really executes.
otool -t ROR1.o | tail -n +3 | awk '{for(i=2;i<=NF;i++) print $i}' | fold -w8 | sed 's/\(..\)\(..\)\(..\)\(..\)/\4 \3 \2 \1/' | tr 'a-f' 'A-F'

60 00 80 92
E1 00 80 D2
82 00 80 92
03 04 C0 93
24 04 C1 93
45 04 C2 93
66 15 80 D2
C7 F0 C6 93
00 00 80 D2
00 00 00 94
Now, let me introduce you to a new friend, theMechanix. This is a program I am writing to analyse malware without risking infections or negative consequences. It’s quite an ambitious project, but in this context, it will help us see what is going on in the registers during the execution.
It will be released for download in a few weeks; this is just a sneak peek :)
theMechanix
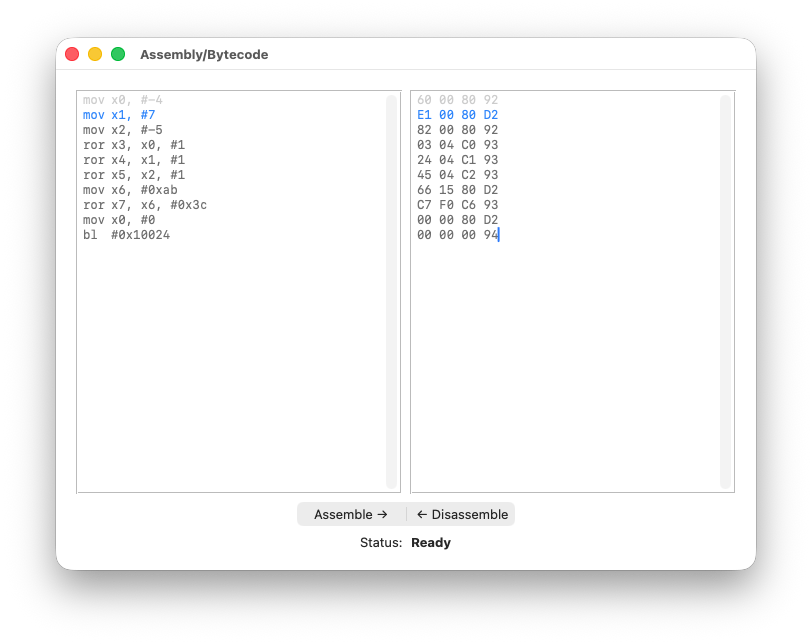
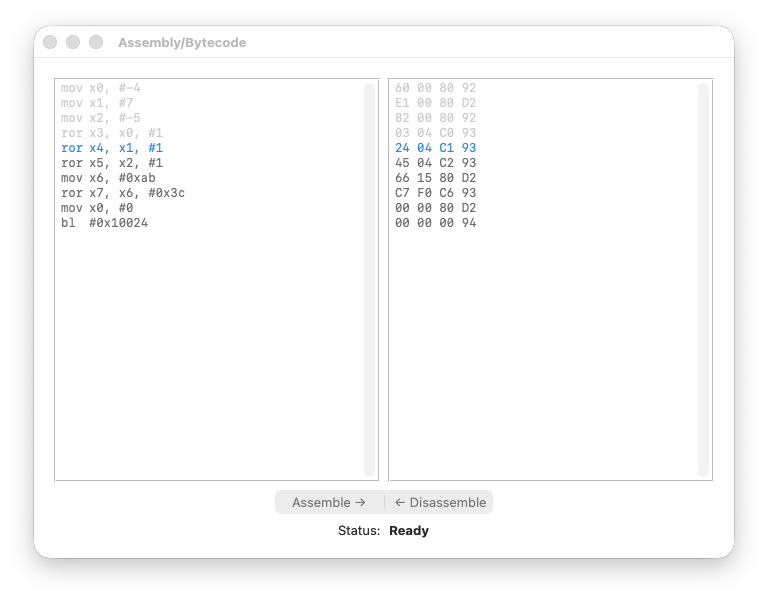
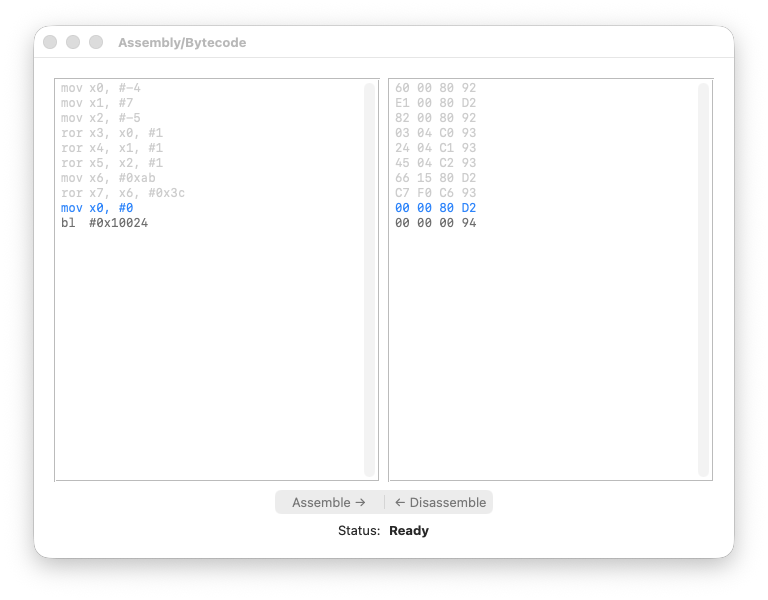
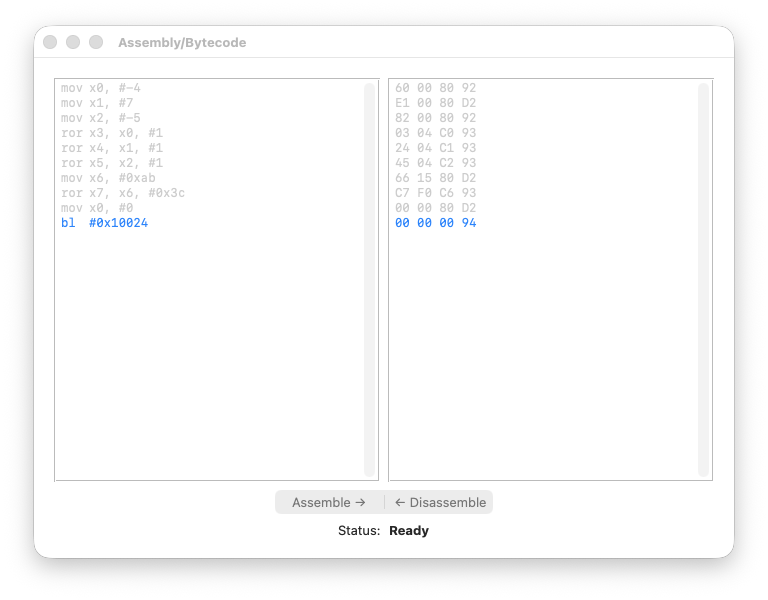
This is the main window of theMechanix:
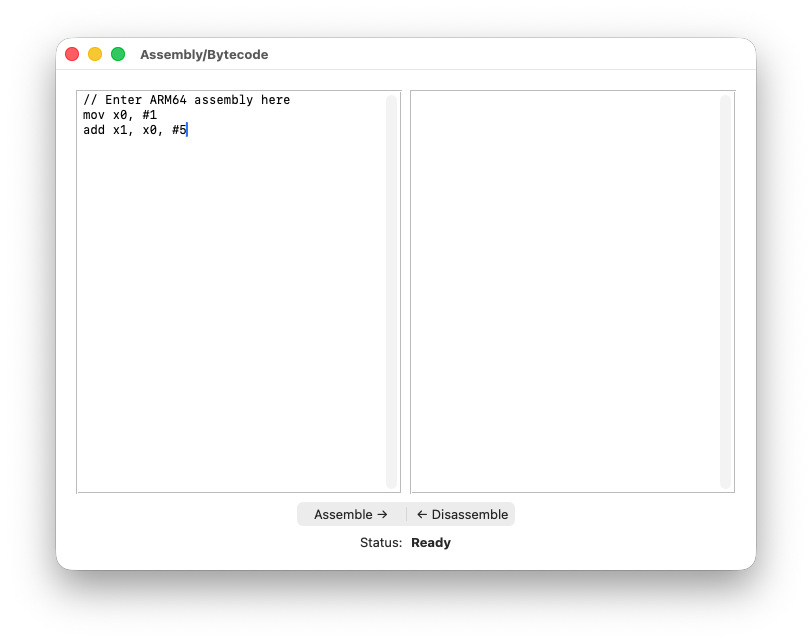
On the left-hand pane you paste the assembly; on the right, the bytecode.
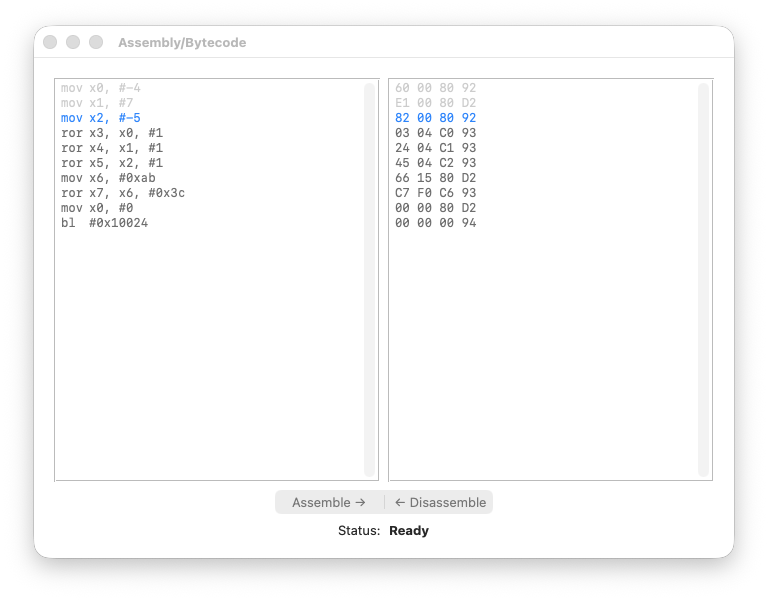
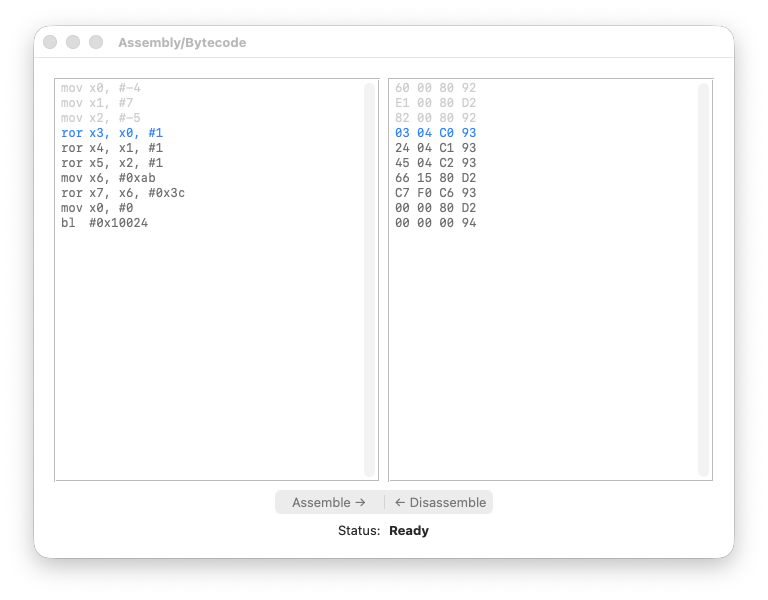
So we proceed as follows: we paste the bytecode and disassemble it, as shown below:
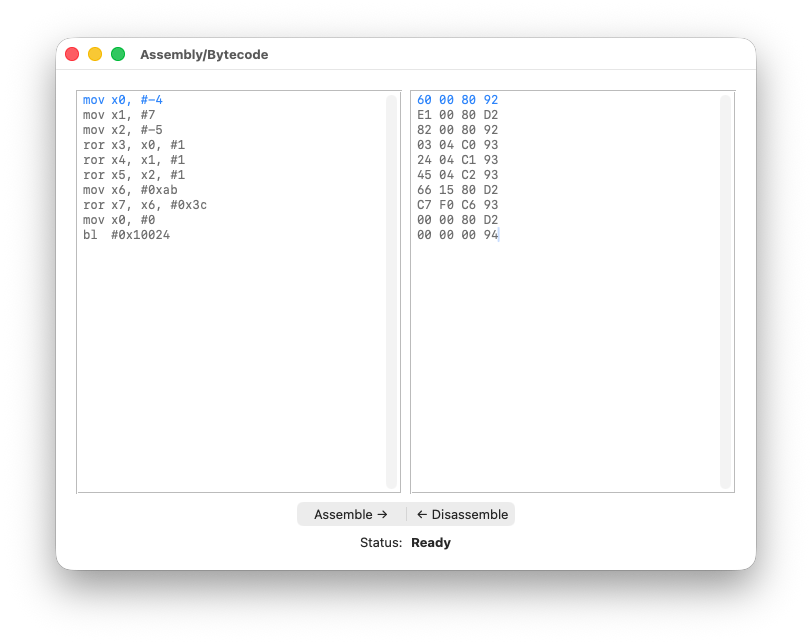
You can already notice the 1-1 correspondence between the bytecode and the assembly - we’re in good shape!
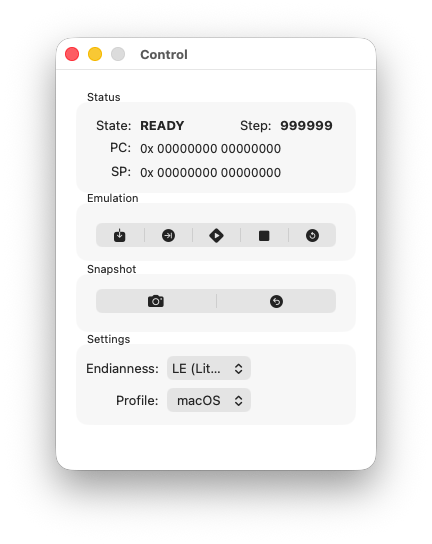
There are a few other windows we’ll be using. The Control window:
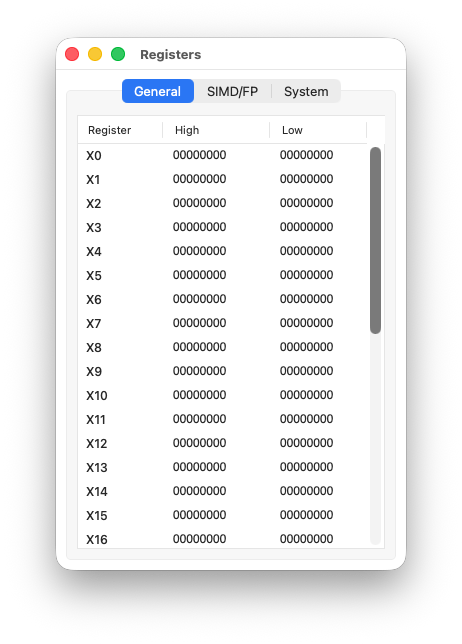
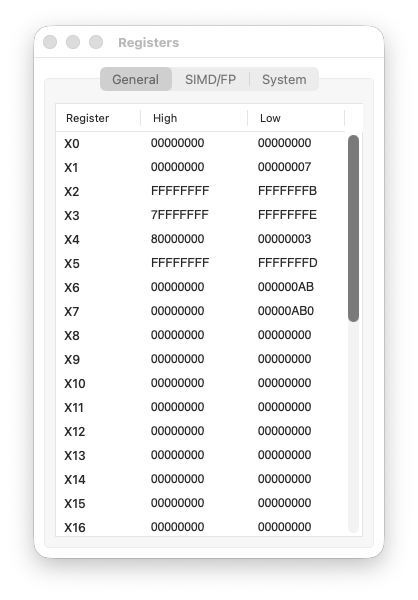
The Registers window, showing the current state of all general-purpose registers:
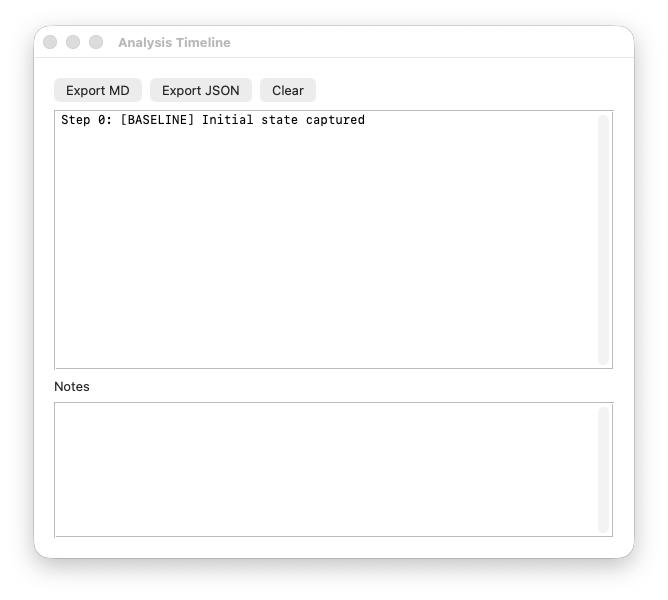
And the Timeline window, which tracks execution history:
Just this once, I’ll show you what the program does using theMechanix. From now on, you should be able to replicate the analysis with LLDB. It’s a good exercise, by the way.
Here we will not do “funny stuff” — the only thing we will do is watch the contents of the registers changing. In practical terms, we will hit the Step button until the program ends, observing how each instruction changes the values in the Registers window.
Here we go.
Step 1 code
registers

Step 2 code
registers

Step 3 code
registers

Step 4 code
registers

Step 5 code
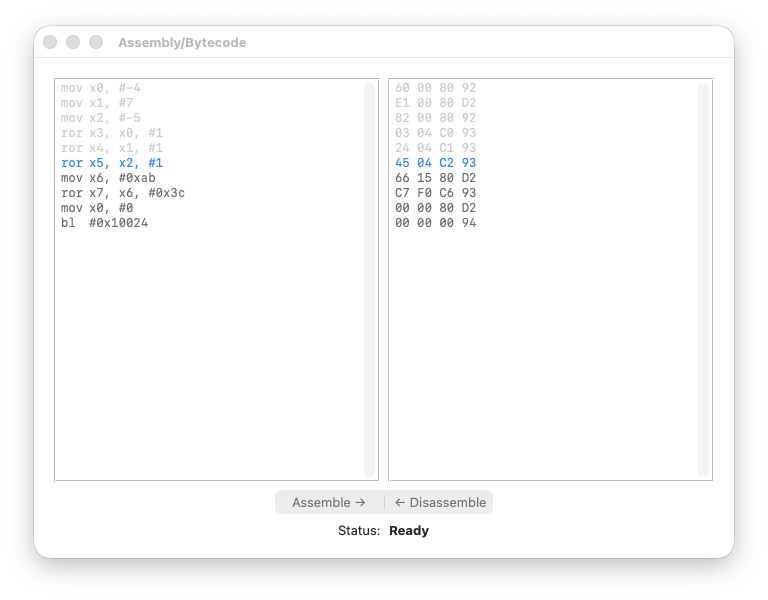
registers

Step 6 code
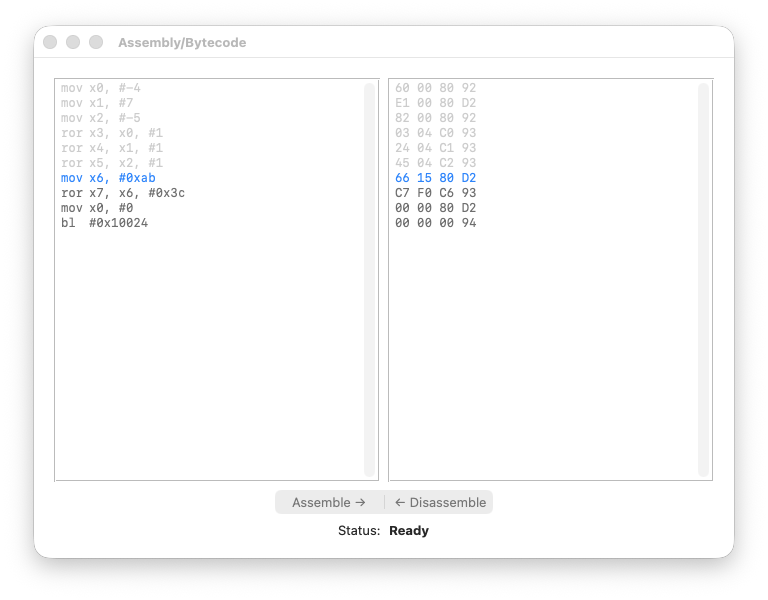
registers

Step 7 code
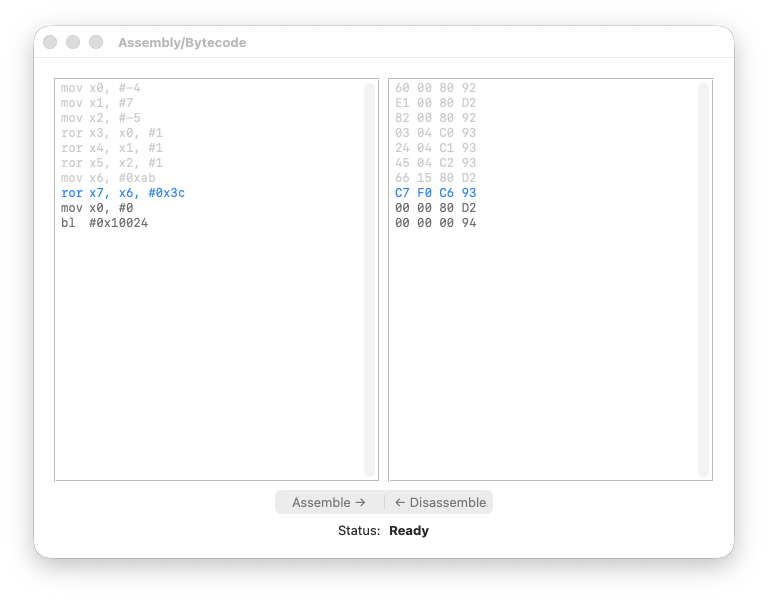
registers

Step 8 code
registers

Step 9 code
registers
The timeline log is also interesting:
Step 0: [BASELINE] Initial state captured

Step 1: [EXEC]
    X0: 0x0 → 0xFFFFFFFFFFFFFFFC
    PC: 0x10000 → 0x10004

Step 2: [EXEC]
    X1: 0x0 → 0x7
    PC: 0x10004 → 0x10008

Step 3: [EXEC]
    X2: 0x0 → 0xFFFFFFFFFFFFFFFB
    PC: 0x10008 → 0x1000C

Step 4: [EXEC]
    X3: 0x0 → 0x7FFFFFFFFFFFFFFE
    PC: 0x1000C → 0x10010

Step 5: [EXEC]
    X4: 0x0 → 0x8000000000000003
    PC: 0x10010 → 0x10014

Step 6: [EXEC]
    X5: 0x0 → 0xFFFFFFFFFFFFFFFD
    PC: 0x10014 → 0x10018

Step 7: [EXEC]
    PC: 0x10018 → 0x1001C
    X6: 0x0 → 0xAB

Step 8: [EXEC]
    X7: 0x0 → 0xAB0
    PC: 0x1001C → 0x10020

Step 9: [EXEC]
    X0: 0xFFFFFFFFFFFFFFFC → 0x0
    PC: 0x10020 → 0x10024

Step 10: [EXEC]
    X30: 0x0 → 0x10028

Step 11: [EXEC]
Observe that branch instructions are not yet managed by theMechanix. That explains why I didn’t release it for download yet.
Commentary
Steps 1–3: Loading the registers
Nothing surprising here. We load:
X0 = -4→0xFFFFFFFFFFFFFFFC(two’s complement)X1 = 7→0x0000000000000007X2 = -5→0xFFFFFFFFFFFFFFFB(two’s complement)
If the two’s complement representation is unclear, revisit the previous lesson.
Step 4: ror X3, X0, #1
We rotate -4 right by one bit.
X0 = 0xFFFFFFFFFFFFFFFC
     = ...11111111 11111111 11111111 11111100
                                           ^
                                           LSB = 0
The LSB (0) moves to the MSB position:
X3 = 0x7FFFFFFFFFFFFFFE
     = 0111...11111111 11111111 11111110
       ^
       MSB = 0 → positive number!
The number changed sign. A negative even number became a huge positive number. This is the key insight: ROR does not preserve arithmetic meaning.
Step 5: ror X4, X1, #1
We rotate 7 right by one bit.
X1 = 0x0000000000000007
     = ...00000000 00000000 00000000 00000111
                                           ^
                                           LSB = 1
The LSB (1) moves to the MSB position:
X4 = 0x8000000000000003
     = 1000...00000000 00000000 00000011
       ^
       MSB = 1 → negative number!
A small positive number became a huge negative number. Again, the rotation destroyed the arithmetic meaning.
Step 6: ror X5, X2, #1
We rotate -5 right by one bit.
X2 = 0xFFFFFFFFFFFFFFFB
     = ...11111111 11111111 11111111 11111011
                                           ^
                                           LSB = 1
The LSB (1) moves to the MSB position:
X5 = 0xFFFFFFFFFFFFFFFD
     = 1111...11111111 11111111 11111101
       ^
       MSB = 1 → still negative
This time the sign is preserved — but only by coincidence. The LSB was 1, and the original MSB was also 1. Don’t rely on this behaviour.
Steps 7–8: Emulating ROL with ROR
Here’s the interesting part. AArch64 has no ROL instruction. But we can emulate it:
ROL #N = ROR #(64 - N)
So ROL #4 becomes ROR #60:
X6 = 0x00000000000000AB
X7 = ROR(X6, #60) = 0x0000000000000AB0
The nibble AB shifted left by 4 bits, becoming AB0. This is exactly what ROL #4 would do.
Why does this work? Rotating right by 60 bits is the same as rotating left by 4 bits — the bits that “fall off” one side reappear on the other.
Step 9: Cleanup
mov X0, #0 prepares the exit code. Nothing special here.
ROL Does Not Exist
If you’re coming from x86, you might be wondering: where is ROL?
The answer is simple: it doesn’t exist. AArch64 is a RISC architecture, and RISC means Reduced Instruction Set. If an operation can be expressed using existing instructions, there’s no reason to add a new one.
And as we’ve just seen, ROL can be trivially emulated:
ROL Xd, Xn, #N → ROR Xd, Xn, #(64 - N)
For 32-bit registers:
ROL Wd, Wn, #N → ROR Wd, Wn, #(32 - N)
The logic is straightforward: rotating left by N bits is the same as rotating right by (register_width - N) bits. The bits wrap around either way — it’s just a matter of direction.
This is a recurring theme in ARM design: fewer instructions, same expressive power.
Conclusions
In this lesson we covered two things: rotations and tooling.
On the technical side, we introduced ROR and understood why ROL doesn’t exist — it’s simply not needed. This is RISC philosophy in action: don’t add instructions when existing ones suffice.
On the tooling side, you got a first look at theMechanix. It’s still a work in progress, but it already shows its value: stepping through bytecode and watching registers change in real time, without the overhead of a full debugger session.
The two will come together more and more as this series progresses.
Next Lesson
We still have unfinished business with boolean operators.
In the next lesson, we’ll explore shifted operands — the ability to combine a shift or rotation with a logical operation in a single instruction. This is where AArch64 starts showing its true power.
We’ll also meet the negated family: BIC, ORN, and EON. Same concepts, faster pace.
See you next time. ‘til then… Have fun!
Gabriel(e) Biondo
ByteArchitect · RevEng3 · Rusted Pieces · Sabbath Stones